Are you using laser-drilled holes or micropipettes to prepare defect samples? I used these methods before, but not anymore. I can help you prepare defect samples in-house within a couple of hours. As you might guess, it costs significantly less compared to using laser-drilled holes or micropipettes. I briefly explained the defects created by wires in the article “Mass Extraction Container Closure Integrity Physical Testing Method Development for Parenteral Container Closure Systems” (PDA Journal of Pharmaceutical Science and Technology, Sep-Oct issue, 2012).
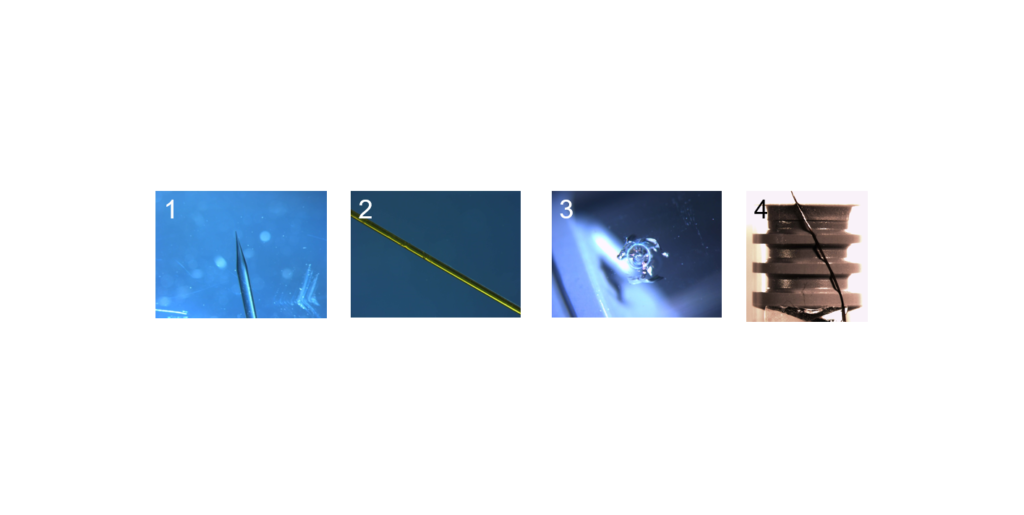
Figure 1 shows various types of defects currently being used in CCIT development.

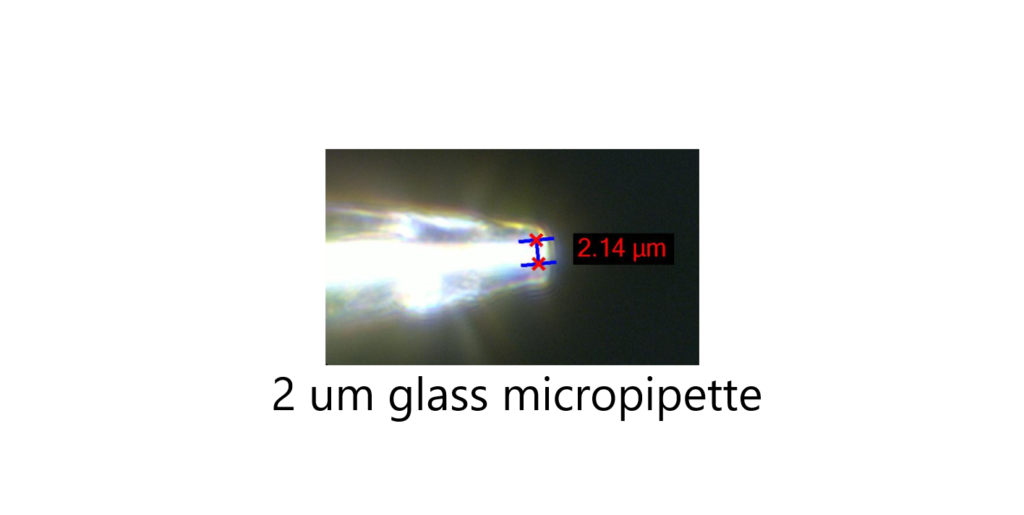
- Glass micropipette: tapered, diameter can be measured under microscope and estimated length of defect is ~0.5 mm, morphology can be defined, use as a reference sample to determine a leak rate from a known size of defect, fragile and difficult to install, difficult to verify intact or broken

- Micro tube: glass tube coated by a polymer, consistent diameter in the entire length, various size available from 2 um, consistent internal diameter – confirmed by x-ray uCT, easy to handle and install, length of a defect is significantly long comparing to other defects, so the leak rate is significantly low.
- Laser drilled hole (actually it is cracks) – nominal size determined by leak rate, there is a series of cracks, morphology cannot be defined, so the nominal size is determined by a leak rate, easy to handle but expensive (> $50 per sample)

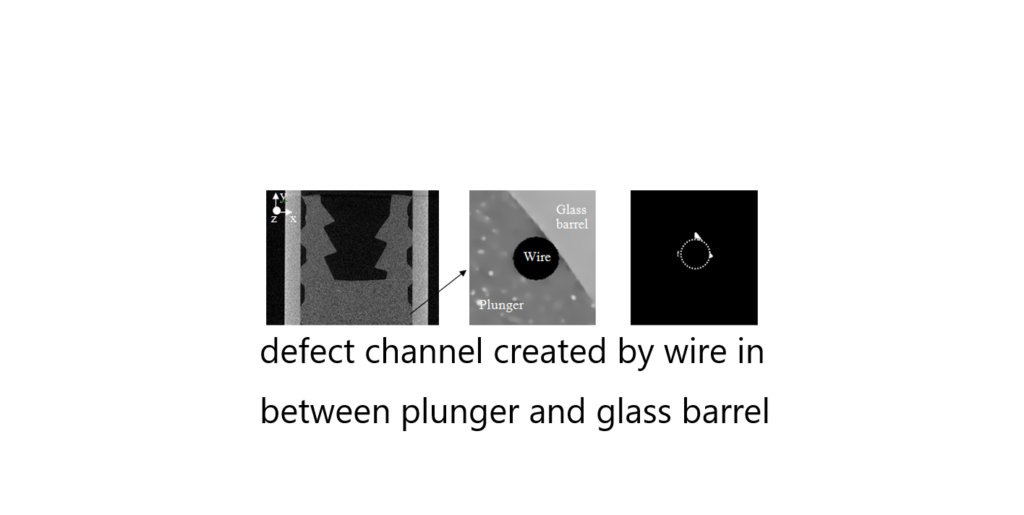
- Wire in rubber contact seal – nominal size determined by leak rate, known size of wire is placed in the rubber contact seal, channels can be created depending on rubber deformation, variation is relatively large (e.g., 5-10 um nominal size instead of saying ~5 um), easy to install and handle

You can prepare consistent defect samples by following the directions below. I understand that preparing defect samples with a laser drill or micropipette can be a time-consuming and costly process. The preparation process must be straightforward; otherwise, you won’t be able to develop and demonstrate robust CCIT methods effectively.
There are three main steps:
- Create a calibration
- Determine leak rate with wire defect samples
- Determine the micropipette equivalent defect size using the calibration curve
By following these steps, you can ensure that defect sample preparation is efficient and cost-effective, enabling you to develop reliable container closure integrity testing (CCIT) methods.
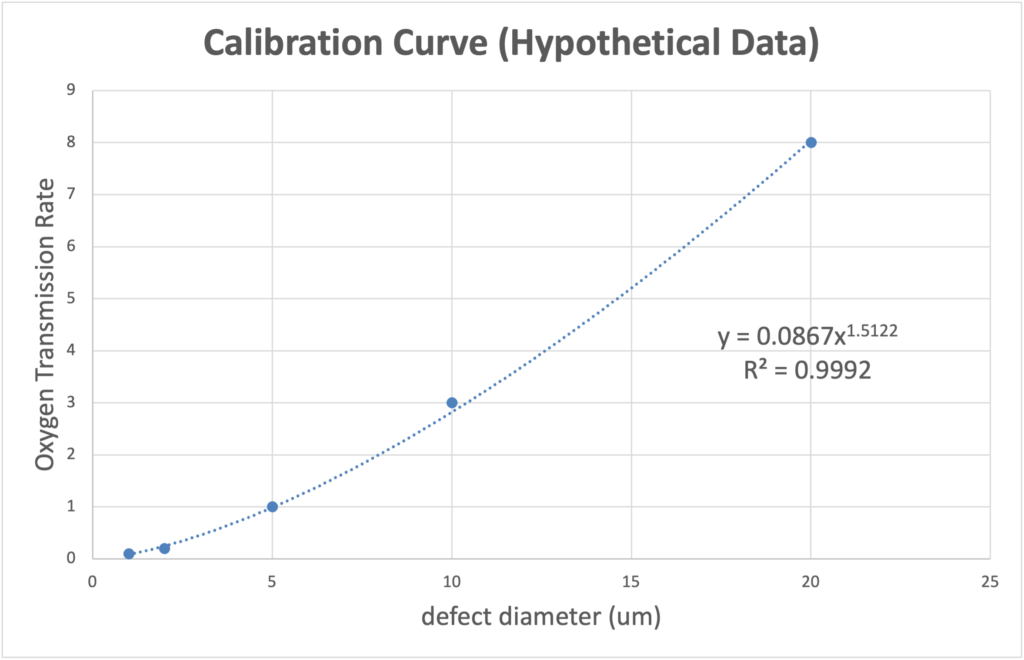
- create a calibration curve with known size of defects and leak rate. This calibration curve can be used for all defects.

The micropipettes are used because their size can be precisely defined. The leak rate can be determined using a gas, such as oxygen. By monitoring the oxygen concentration inside the container where the micropipette is installed, the oxygen transmission rate can be determined.
2. Prepare Wire Defect Samples with Various Outer Diameters: To prepare the wire defect samples, place the wire between the seal (e.g., between the compressed rubber stopper and the top of a glass vial, or between the compressed rubber plunger in a syringe barrel).
3. Determine the Leak Rate with Wire Defects: Determine the leak rate using the wire defects and then establish the micropipette equivalent defect size through calibration. For example, the oxygen transmission rate (OTR) from a 75 µm outer diameter (OD) wire is equivalent to the OTR from an ~8 µm micropipette.
By following these steps, you can create consistent defect samples that will help in developing and demonstrating robust Container Closure Integrity Testing (CCIT) methods.
You might be aware that a similar approach is used to develop defects with laser-drilled holes. What do you think about this method? Are you considering investing in setting up the wire defect capability, or would you prefer to pay for micropipette or laser drill crack samples?
